You can’t attend a meeting, it happens to all of us. Now what?
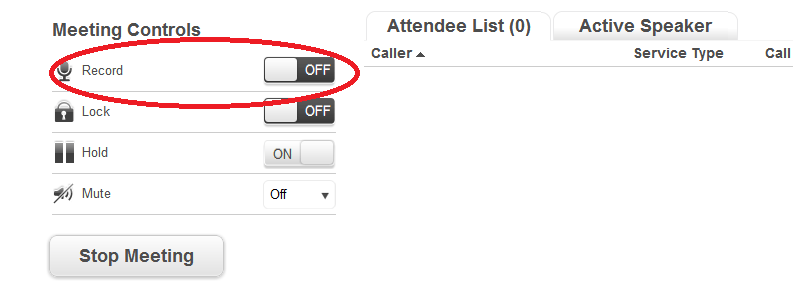
The host of the StartMeeting conference can help by recording it. Recording a meeting might sound intimidating, but in reality the process is quite simple. At the beginning of a meeting the host can record both the audio conference and the screen share session from their meeting controls (which we will discuss in full on our next post). Below you will see an image of the button that has to be switched to ‘ON’, that’s it. StartMeeting will record the visual and audio portion of the meeting (if both are being used, otherwise only audio is recording if screen sharing is not being used and vice versa). Once the meeting is completed the recording button must be switched to ‘OFF’.

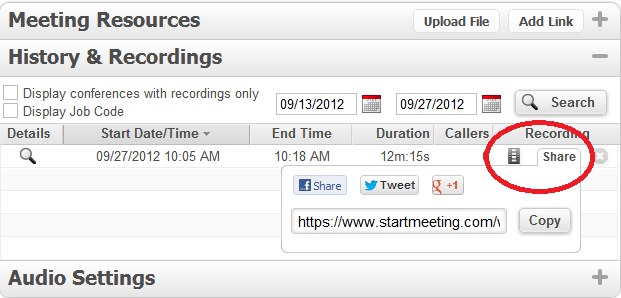
To share the recording, the host can locate the recording from the ‘History and Recording’ tab located on the Meeting Wall. Recordings can be shared publically through Facebook, Twitter, and Google Plus by simply copying the link provided and pasting it on your favorite social media network. The alternative option is to share it by simply sending the link via email. See, extremely easy!

StartMeeting recording is cloud based, which means, no hassle downloading anything to your computer! However, downloading the file is available for your convenience. Recordings are available for both Mac and Windows. StartMeeting will provide 1GB of free recording; extra storage is available for an extra fee.
Go on and register for your own StartMeeting account. Begin recording and sharing today!


